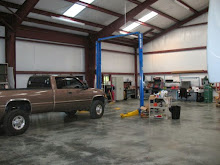
It has been a while since my last update but I just haven’t been able to get around to updating the blog. It’s been pretty busy and when I get home from work I just don’t feel like touching a computer. Anyway, enough with the excuses. Today I want to write about my “brewery” and show off a few pics of it. It’s not awesome or anything but it sure does the job and provides a comfortable place for me to brew. I’m looking forward to some cooler temperatures so I can fire up the burners again.
As you all know, I love my garage and I try to spend as much time as I can in there. I also like to make beer. Beer can be a very delicate thing to brew because fermentation temperatures can play a huge role in how the finished product will turn out. If the beer ferments too cold or too hot the yeast will react in unpredictable ways, often tainting the flavor of the beer. Not only that but sunlight plays a factor as well, so fermenting beer must be kept in a dark place. To control both of these factors I built a 5x5 shed in my garage to house fermenting beer in a temperature controlled and dark environment. Check out the following pics out to see how it is set up.
 This is a view from the front of the garage. Notice the shed in the back.
 A closer view of the fermentation room.
 This is a view of the inside. On the floor is a carboy with some barley wine I made in the winter. Also notice the plate chiller which is used to cool hot wort to pitching temps very quickly.
 I also have a portable refrigerator that I modified to lager beers in. Because lager beers need to rest at as close to freezing as possible, I pulled out the temp probe of the fridge and set it up with a temperature controller. Because the default temp probe is outside of the fridge, it always thinks that it is warmer than the factory setting thus keeping the compressor on when the power is on. The temperature controller detects the appropriate target temp and turns the fridge on and off accordingly. Genius I know. : )
 This is the beer I have in the fridge.
 This is the AC unit that is used to keep the shed at a constant 68 to 70 degrees for fermentation. In the winter I have a portable heater for the same purpose.
 Oh and I use this room as the base for the audio system by the pool. No need to worry about amps over heating if they’re in a temp controlled room.
 Outside of the fermentation room is my work area.
 And this here is for ingredients and supply storage.
 I got about 6 of these steel cabinets at a local auction for about $25 TOTAL. As you can see I put one of them to really good use.
That’s it in a nut shell. Thanks for reading. My next installment will go over my process for making a beer yeast starter. Stay posted!