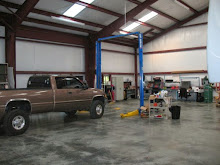
I’ve had this truck for a long time and after many camping trips with Les and the kids the interior has become a little worse for wear. This year I bought some new leather upholstery from LeatherSeats.com. I also picked up a new carpet from StockInteriors.com. I chose a two tone leather and a mist gray carpet.
The first step was to remove the seats and carpet.
 After the seats were unbolted and removed the carpet looked terrible! Wow a lot of crud fell under the seats.

The seats out and on the garage floor.
 Justin helped remove the rear bench seat.

I guess Justin thought it was hard work.
 After the carpet was removed this is what was left.
So now that everything is out my plan is to replace the carpet, recover the seats, upgrade the audio system (better sounding, blue tooth, dvd for rear passengers, and a rear view camera), and finally put a dash cover on the dash to cover the cracked dash. Today we began working on the seat covers.
 This is the rear bench seat and where the 3 boys spend most of their travel time on camping trips; so it’s a big friggin mess. I put it up on saw horses and began to take it apart.
 After taking the plastic covers off I could see the seat release mechanism. This is what holds the seats together and controls the up/down motion of the bottom seat for under seat storage. Before I could get the seat back off I needed to remove this by removing the 2 bolts. This allowed the seat back to come free.

Starting with the bottom cushion, I removed the old seat cover by peeling it off.
 Putting on the new cover was as simple as flipping it inside out and rolling it onto the cushion. Very easy! Leatherseats.com puts a zipper on the back side of the cover to seal it up.
 After a very similar process, the seat back was covered. We put it all back together and here is the finished product.

Next, the passenger seat.

We turned the seat upside down and found 4 bolts used to hold the bottom cushion in place. After removing these the cushion was easily removed from the chair.
 This is a hog-ring. Apparently they are used quite often in upholstery. I found some hog ring pliers and some hog rings at Ace Hardware so that I could tack down the new cover.

The bottom cushion with the new cover.
 Now the seat back. This was pretty easy except for the seat belt slot located in the seat back.

I cut a slot in the leather and trimmed enough foam and leather to allow the bracket to click back into place.

The final product.
 Next the center console. We didn’t finish it today but holy crap what pain in the a$$. More to come later!


