This weekend I had the pleasure of doing some maintenance work on my G35. This car is so much fun to drive, and doing maintenance work on it is definitely just as fun. I took some photos during the job and they’ll be posted here. My digital camera died half way through the radiator fluid change so you’ll have to use your imagination for some of that!
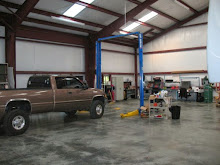
Here it is up on the lift:
First job was the oil change. I’ve changed a lot of oil over the years but it doesn’t get any easier than this car. Once you remove the plastic cover you are presented with the easiest filter access ever.


See what I mean? The drain plug and filter are located within easy reach!
I feel kind of silly posting a caption to this one. The is the drain plug – unscrew it and the oil will drain.


Rear Differential
The car has 42000 miles on it so I figured it’s time to do the differential fluid change.


This is the oil I bought to put into the differential. I usually stick to Amsoil but the decision to change this fluid was a last minute one. I have a gear oil pump that I use for the boat which I used to push the fluid up into the differential. Sorry no pictures.

Radiator
Ok this project is more complicated that the pictures below seem to represent. My digital camera decided to refuse to take any pictures that required a flash. Lesley is going to find me a new one this week, so the next update will be completely illustrated!
Firstly I want to give props to www.infinitihelp.com. It’s a great website that includes a ton of informative stuff about the car, but also includes a nice forum and free downloads of the infiniti shop manuals. Because of those manuals I was able to do this job relatively easily.

Ok after this, the camera is officially dead. : ( After the fluid had drained, I lowered the car and removed the air intake on the drivers side. I did this because I needed to gain access to the air bleed screw on the radiator. Infiniti has a neat feature that is used to vent air as new fluid is added to the system. The plug on the radiator was easily removed once the air intake was moved. There is also an air bleed screw on the heater hose up next to the firewall. An allen wrench is needed to remove this.
I added fluid until it began to flow out of the air hole on the radiator. I put that plug in and added more fluid until if overflowed out of the heater hose at which time I put that plug back in.
All done.
After all that I went out and bought a copy of Scribblenauts DS only to find out that it comes with a free hat. Garrett is more than happy to model it for us. : )


